

Intro to 'DIY' Recording for Educators
- michelleambruz
- May 9, 2018
- 4 min read
If you're a professor, teacher, lecturer, or provider of any kind of instructional content online (e.g. Massive Open Online Courses, or MOOCs), these videos and this post are meant for you.
These past few weeks, I've started to produce a series of videos that I'm calling "DIY Recording for Educators: Developing a home/office studio solution for higher quality video content." The series will attempt to provide a concrete model of a "low-touch," no- or low-post video/audio recording solution for educators that provides great quality content with cost-effective gear and very little, if any, editing.
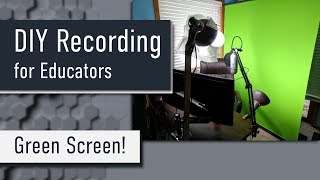
The first video below is an introduction outlining what these videos are meant to accomplish; the second breaks down in more detail my current setup, its pros and cons, and the steps I plan to take next. The rest of this post provides some extra background to the project and its goals. I apologize in advance for its length; brevity in writing is not my forte.
In my capacity as a Video Production Specialist at the local university - part of which involved helping faculty create videos for their online courses - one concept in particular kept surfacing in our discussions of potential production models to offer our academic clients: that of the "low-touch" audio & video recording studio. In this model, faculty would be able to schedule blocks of time to come into the studio with their course material (often in the form of Powerpoint presentations), a video operator would power up and test the equipment, and then the faculty would themselves record as many lectures as they could in their allotted time, largely unsupervised, using a software like Camtasia to overlay the camera feed with their slides.
This idea stood as a possible alternative to our more intensive studio production methods, which involved lots of lights, professional cinema cameras (and the staff to operate them), top-tier audio gear, a teleprompter, and - since everything was recorded separately from the visual course material - a LOT of post-production. I got the sense that this production model could intimidate some of the faculty, especially those new to the process of creating videos. I understand this feeling completely; standing under those bright lights and talking to an emotionless camera lens is NOT the same as lecturing in front of even the largest campus classes. But more importantly, most felt that they didn't NEED that level of production. To be fair, they probably didn't. We definitely created some fun and amazing videos in that space - just see the reel on my home page to get a sense of what we produced - but for every instructor that used our studio method for their videos, there were probably two or three who would instead, for better or worse, decide to self-produce. We had very little middle ground to offer.
The long editing times on these videos didn't help the matter. Even when we weren't trying to be fancy, timing the visual content to the studio recording meant watching each lecture multiple times over, some of which approached 15-20 minutes in duration. With roughly 40 videos per course, and one person handling multiple courses at once, minimizing edit times became more and more imperative. So in our concept of a "low-touch" recording solution, faculty would (mostly) operate on their own, record their lectures and visuals simultaneously, and have a finished video in hand after very little - if any - post-production.
Models for this sort of online course production already exist across several universities, and many feel lacking to me as a video professional. One of them, for example, involves pointing a camera at a lecturer next to a small projector, which to me seems... not great. On the other hand, when I came home every evening and fired up Twitch.tv to watch my favorite streamers live-stream their video gaming sessions - some of which were educational in that they were actually teaching a specific game - I thought to myself that THIS was exactly the kind of setup we needed for our clients. These streamers switch between title cards, full-screen camera feed, visuals, and combined picture-in-picture layouts with a keystroke (something you can't do live in Camtasia); they incorporate live content from their desktop and/or an external source (like a gaming console); and because they broadcast in real time, their setup is by nature designed to need absolutely NO post-production. I still fully believe that with some small adjustments, this model of production can easily translate to MOOCs and other online educational content.
While I no longer work for the university, my time between projects has largely been devoted to building some form of this low-touch, no/low-post recording solution in my own home office. This project is partly meant to let me play around with some tech in my spare time. But more importantly, it's meant as an offering to educators who might feel stuck in the process of creating online courses, or who might be looking for an alternative to full-blown studio production vs recording at home on a low-quality laptop camera and microphone. My goal is to prove that you can have elements of both - good quality video, decent audio, cost-effective equipment, and a versatile setup for a production studio OR a home/office. And I would love to see the robust and enthusiastic conversation surrounding live-stream production leak into the world of MOOC production and online course videos.
For feedback, questions, or suggestions for anything you'd like me to discuss in this series, feel free to leave a comment on this post and/or send me an email. Specific links discussed in each video can be found in the descriptions on Youtube.
Happy recording!
- Michelle
Comments